
Get PiePost
About PiePost
PiePost is a desktop appliction that builds you a personal website and automates the posting
process. Easily build and maintain your blog, scrapbook, or public journal. PiePost makes it
easy, if you are an experienced developer or new to coding, PiePost will save you time
formating and deploying html. Upload your media, write a caption, and all it takes is a click
of "Build Post". Your website will be up and running.
With PiePost you have complete control over your data and your website. PiePost automates writing
code but the code is still html and easily editable. Your public data is stored in posts.json which
you have the freedom to edit and delete.
- File Size: 14.6 MB
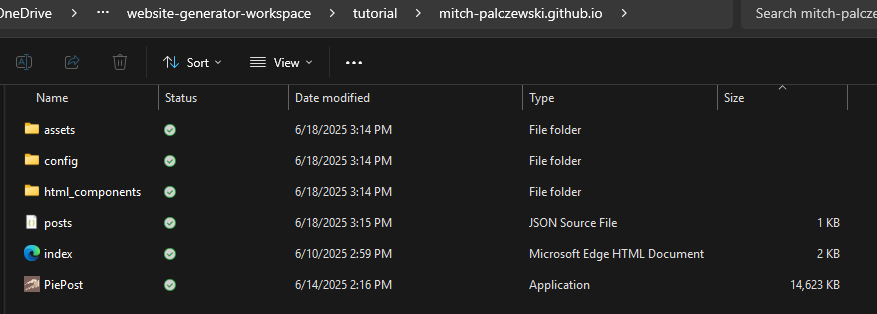
Zip File Content
assets: folder - stores uploaded images
config: folder - stores app data and prefrences
themes: folder - stores html themes
index.html: html - your webpage
PiePost.exe: executable - Click on this to build your webpage
posts.json: json - stores information about your posts to make availible to the internet
To set up PiePost it takes a few steps. PiePost writes html for you but you still need to host your website somewhere. There are many options for free or paid website hosting. Bellow are tutorial for hosting options.
Tutorial for PiePost-1.2.0 with Github
What you need:
- 1 - PiePost Desktop Application
- 2 - Github Account
- 3 - Github Desktop Application (for ease of use)
If you have not done so allready create a Github Account and download PiePost and Github Desktop.
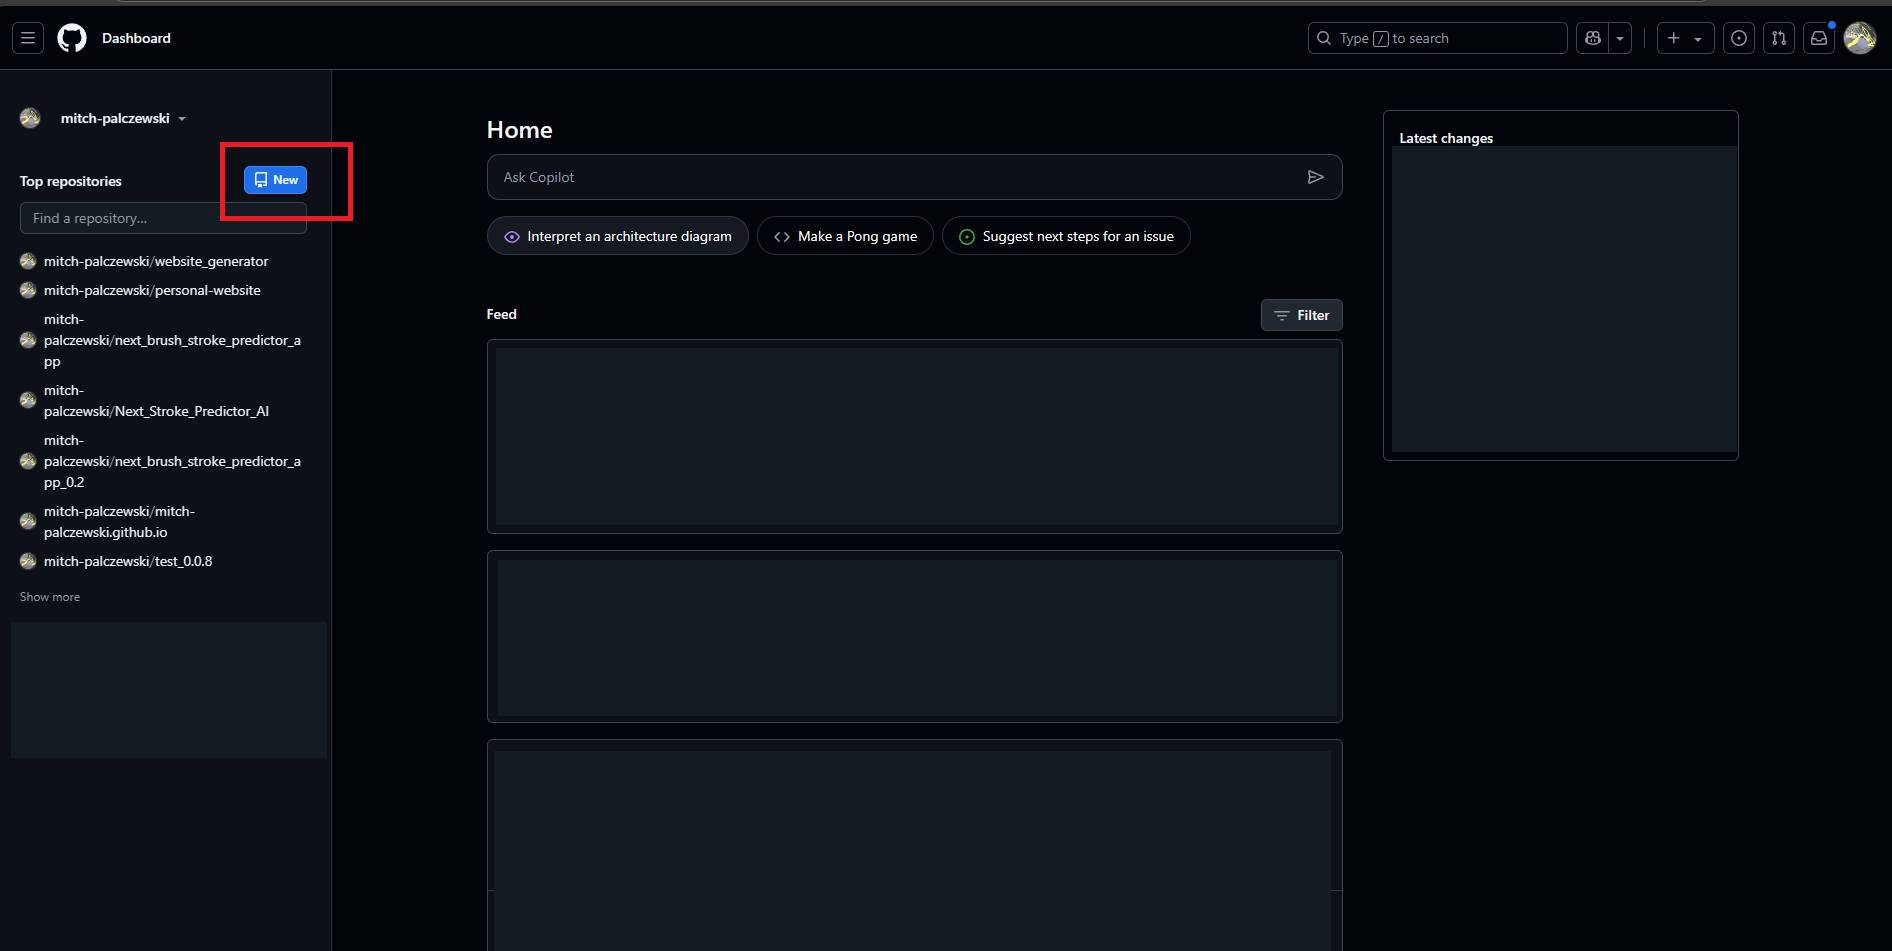
Step 1 Create a github pages repository
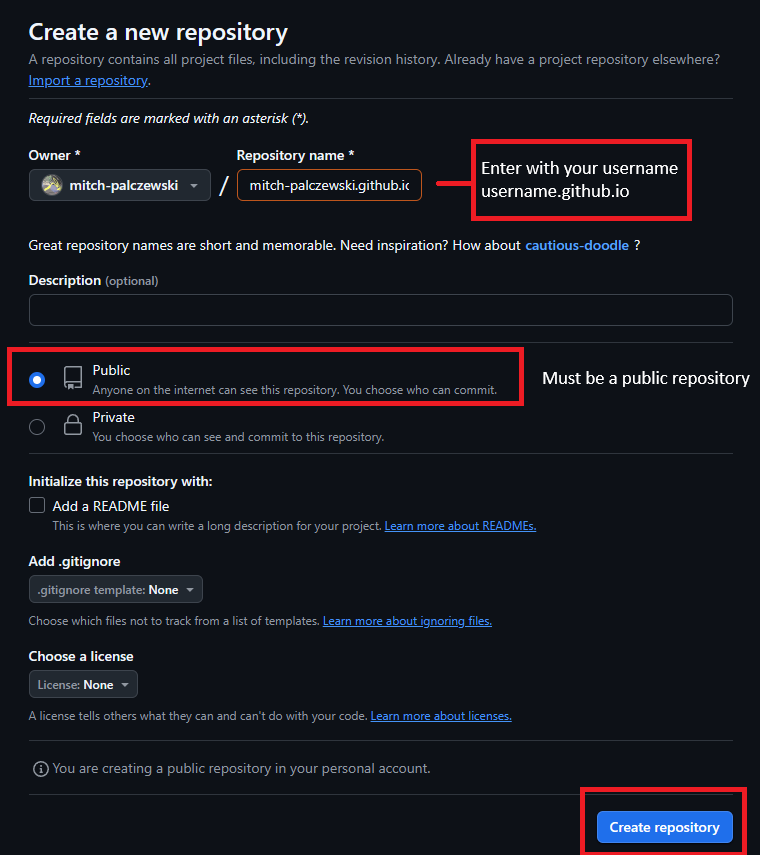
Go to GitHub and create a new public repository named username.github.io, where username is
your username (or organization name) on GitHub.
If the first part of the repository doesn’t
exactly match your username, it won’t work, so make sure to get it right. The repository must be
public.
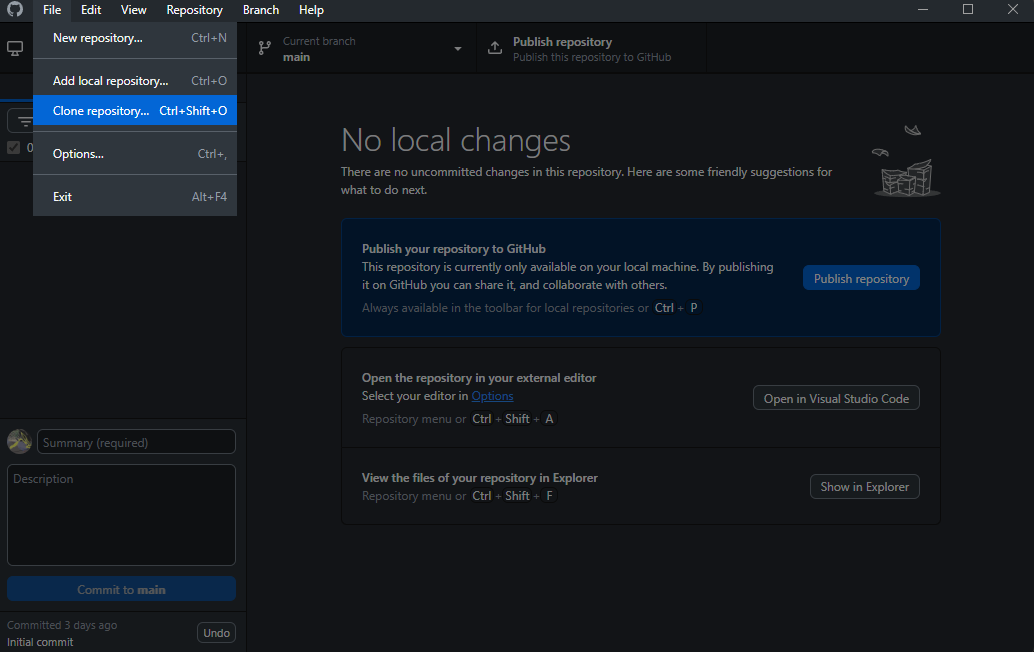
Step 2 Cloning
In github desktop go to file -> clone repository.
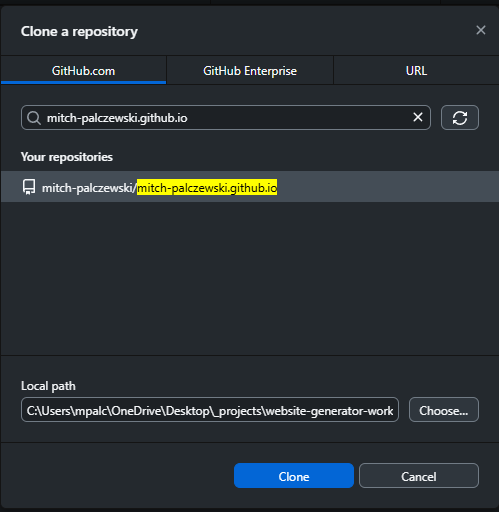
Then select the repository you just made
username.github.io and the folder in which you wish it to live This will create a folder called
username.github.io

Step 3 Copy Files
Unzip and copy the contents of the PiePost folder zipfile into that folder username.github.io
Step 4 Configure Git
open PiePost.exe
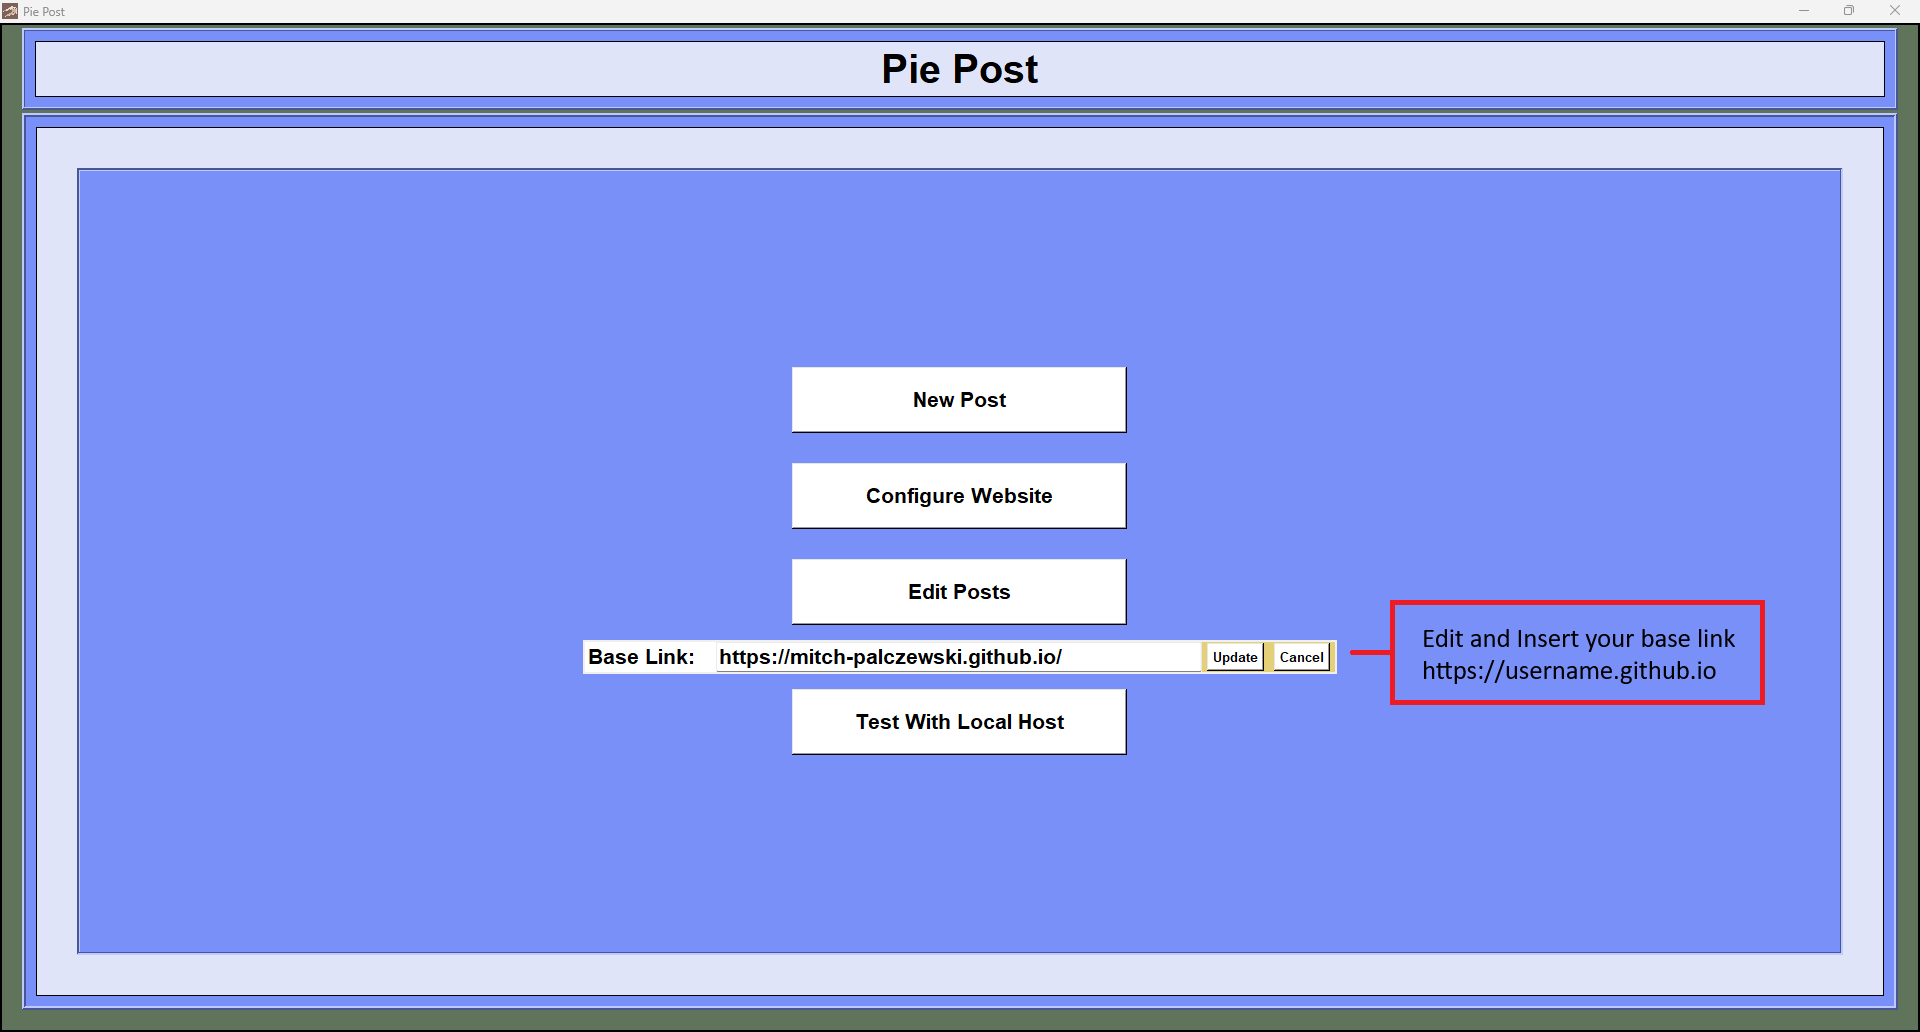
On the landing page
Edit the base link.
Enter https://username.github.io/
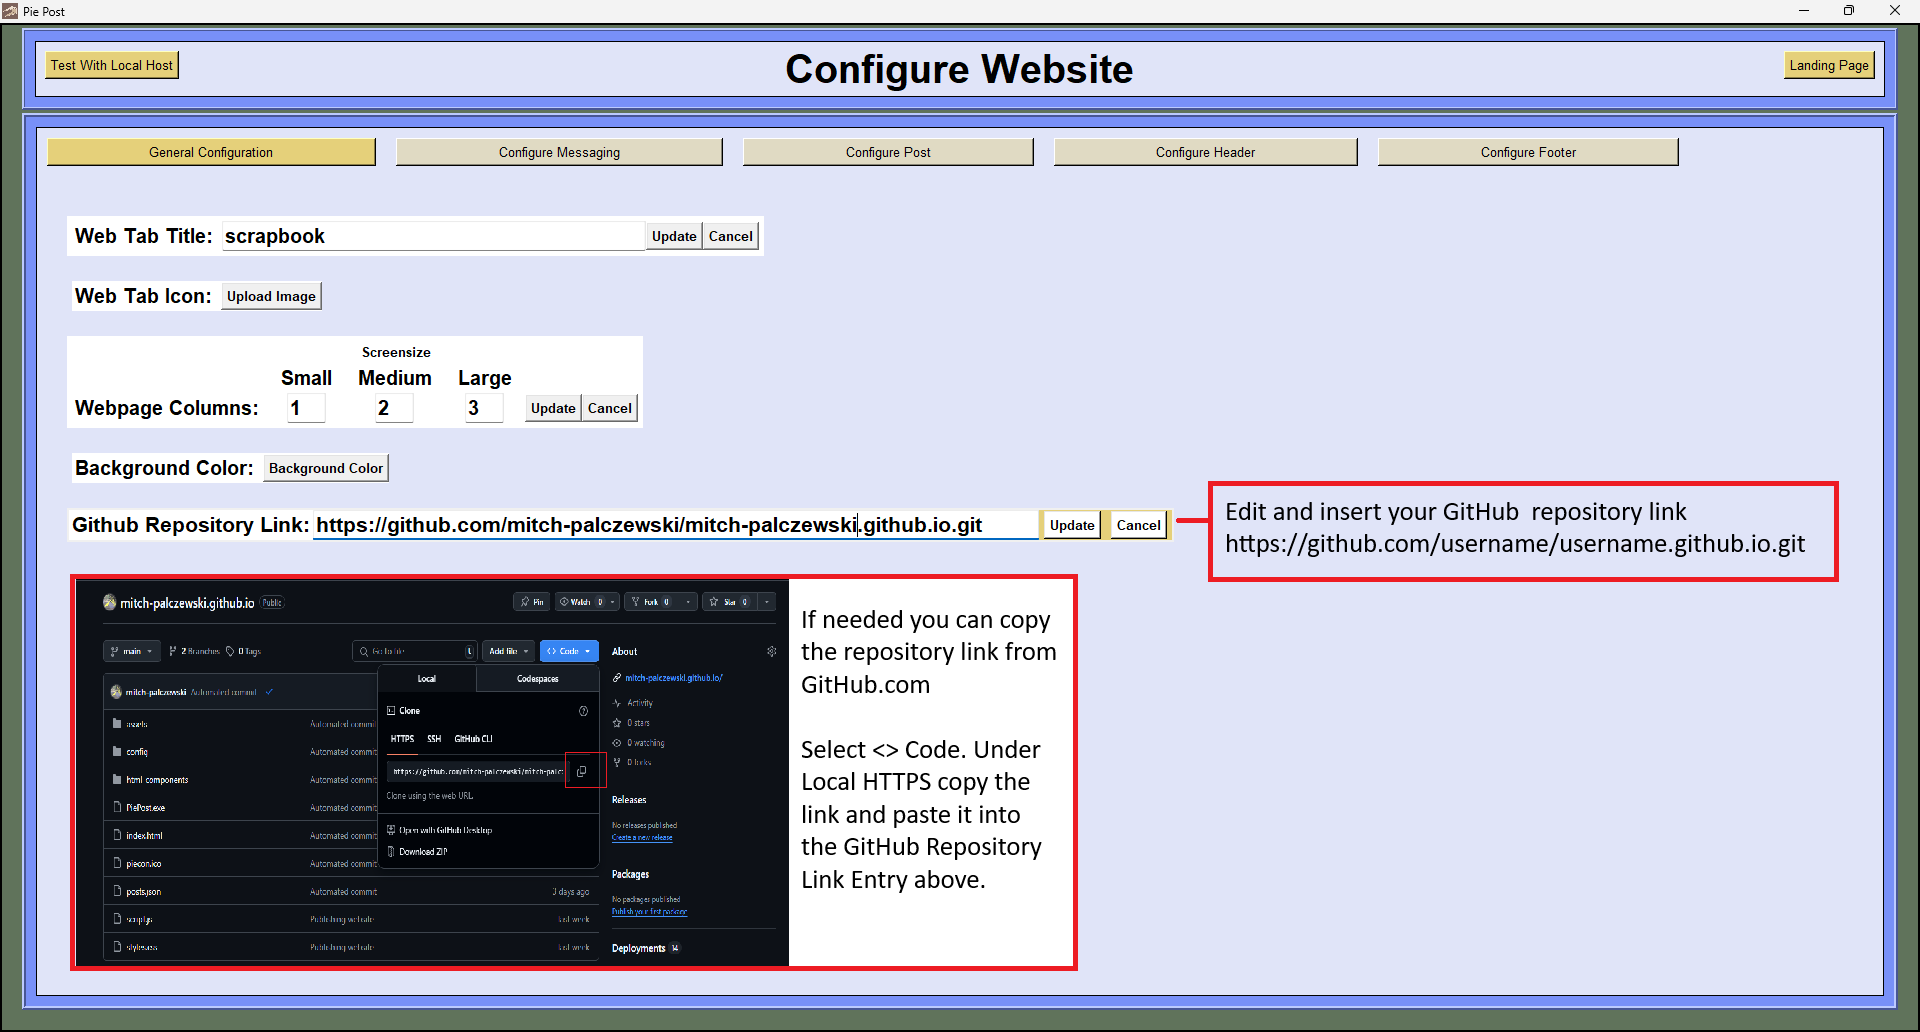
Navigate to configure website -> general configuration
Edit the github repository link
Enter https://github.com/username/username.github.io.git
(Where username is your github username)
You Are Ready To Start Posting
Note: Using Github is a great way to automate posting but for a simpler instillation process take a look at hosting with neocities